We dry thousands of lime wheels every week in White Plains, New York, for over 1,300 bars and restaurants across the country. Lime is the highest-volume garnish we produce — Margaritas, Palomas, Mojitos and Moscow Mules run the industry — and it's also the single hardest citrus to dehydrate well.
Here's the part most guides won't tell you up front: your limes are going to lose some of that bright green. Every home batch does. Every commercial batch does too. The difference between a garnish-quality lime wheel and a sad brown coin isn't a secret dip or a magic additive — it's temperature control, slice thickness, and a drying curve you can actually reproduce.
This guide is the process we use, published without reservation. All three methods — food dehydrator, oven, and air fryer — plus the yield math, the conditioning step that prevents storage mold, a straight answer on browning, and a cocktail pairing guide. If you'd rather skip the eight hours, we sell the finished version: dehydrated lime slices, 55 to a bag.
Why Dehydrated Lime Wheels Are a Bar Essential
A fresh lime wheel starts dying the moment it's cut. It oxidizes at the edges, goes limp within a couple of hours on a garnish tray, and slides off the rim into the drink on the way to the table. On a Friday night with a three-deep bar, that's wasted product and a garnish that photographs badly.
A dehydrated lime wheel solves all three problems at once. Dried at low heat, it concentrates the peel's citrus oils rather than losing them — lift the glass and you actually smell lime. It holds a rim perch all night without drooping. And a properly dried, properly sealed batch gives you an inventory buffer that fresh fruit can't: no daily prep, no spoilage, no scrambling when a case of limes shows up soft.
Lime is also the most versatile garnish in the well. It works on a Margarita, a Paloma, a Mojito, a Moscow Mule, a Ranch Water, a Daiquiri, a Gimlet, a Gin & Tonic and a Michelada — that's most of a summer menu with one SKU.
[QUOTE]Lime is the garnish our accounts reorder fastest, and it's the one most home batches get wrong. Get the temperature and the thickness right and it's the best-performing dried citrus there is — rigid enough to hold a salted rim, aromatic enough that the guest notices.[/QUOTE]
For a real-world look at what this does at volume, see our wholesale case study on scaling high-volume Margaritas with bulk dehydrated lime wheels.
What You'll Need
Ingredients
- Fresh limes — Persian (Tahiti) limes are the default; see the variety guide below
- Cool water for washing
- That's it. No citric acid, no lemon juice, no sugar syrup, no blanching required. We explain why in the browning section — this is the single biggest piece of misinformation in this category.
Equipment
- Mandoline slicer — non-negotiable. Limes are small and round, which makes uniform knife cuts harder than with oranges. Uneven slices dry unevenly: some scorch while others are still wet in the middle.
- Sharp serrated knife (backup for the mandoline) and a cut-resistant glove
- Food dehydrator (preferred), or a conventional oven, or an air fryer with a dehydrate function
- Wire cooling rack + rimmed sheet pan (for the oven method)
- Parchment paper or a silicone baking mat
- Clean kitchen towels or paper towels for blotting slices dry
- Airtight glass mason jars or vacuum-sealed bags for storage
- Food-safe silica gel desiccant packs — critical for long-term storage, mandatory in humid climates
- Optional: a kitchen scale, if you want to use the commercial weight test
Choosing the Right Lime — Variety Comparison
Almost every guide on this topic says "limes" and moves on. The variety you pick changes your dried color, your yield per fruit, your bitterness level, and how long the batch takes. Here's the actual breakdown.
| Variety | Dried Color | Flavor Profile | Best For | Approx. Yield (per lime) |
|---|---|---|---|---|
|
Persian / Tahiti Lime (the standard grocery lime) |
Olive-green to amber; translucent center | Clean, sharp, seedless, moderate bitterness | The workhorse — Margarita, Paloma, Moscow Mule, Ranch Water | 6–8 garnish-quality wheels at ⅛" |
|
Key Lime (Mexican / West Indian) |
Pale gold to tan; darkens faster | More floral and aromatic, noticeably more acidic | Small glassware, Daiquiris, mocktails, garnish clusters | 3–4 wheels — small fruit, plus you'll be picking seeds |
|
Makrut Lime (leaf variety) |
Deep green-brown, heavily textured | Intensely aromatic peel, very bitter flesh | Aromatic infusions and tiki presentation — not an eating garnish | 4–6 wheels, decorative use only |
| Finger Lime | Doesn't wheel — dries as pearls | Bright, caviar-like burst | Not suitable for wheel garnishes; use fresh | N/A |
Pro note from our production floor: use Persian limes unless you have a specific reason not to. They're seedless (or nearly), the 1.5–2" diameter is the correct proportion for a rocks or Collins rim, and the peel-to-flesh ratio dries the most evenly. Pick fruit that's firm, heavy for its size, and deep green — a lime that's already yellowing is past peak and will dry duller and more bitter.
One thing to avoid: limes with thick, spongy peel. That white pith is the source of nearly all dried-lime bitterness (see Why Dried Limes Taste Bitter), and a thick-skinned lime gives you a garnish that's mostly pith.
Prep: Washing, Slicing & Blotting Your Limes
Every commercial batch starts here. Uniform 3mm wheels, blotted dry before they ever hit a tray.
[RECIPE] Prep: Washing, Slicing & Blotting Your Limes Prep time: 10–15 minutes Yields: 6–8 garnish-quality wheels per Persian lime Ingredients: - Fresh Persian limes - Cool water for washing Equipment: - Mandoline slicer set to ⅛" (3mm) - Clean kitchen towels or paper towels - Cutting board Steps:
- Scrub the limes under cool running water with a produce brush or a clean towel. The peel is visible — and edible — in the finished garnish, so this step isn't optional. Dry the exterior before slicing.
- Trim a thin slice off each end and discard. End cuts are mostly peel and lack the symmetry of a proper wheel.
- Set your mandoline to ⅛" (3mm). This is the commercial garnish standard and the number we cut to in production. Thin enough to dry translucent and crisp; thick enough to hold a salted rim without tearing. Go to ¼" (6mm) only if you're drying for cooking, tea, or lime powder — not for cocktail garnish.
- Slice each lime into uniform wheels across the entire fruit. Work steadily and keep pressure even; a mandoline that hesitates gives you a wedge, not a wheel.
- Pick out any seeds with the tip of a paring knife. Key limes will have several per wheel; Persian limes usually have none.
- Lay the wheels in a single layer on clean towels and pat them firmly dry — top and bottom. Lime is juicier per square inch than orange, and that surface juice is what makes slices weld themselves to your trays. Blotting cuts total drying time, improves color retention, and is the step most home batches skip.
[/RECIPE]
[PROTIP]Blot, don't rinse. Rinsing cut wheels adds water back to the surface — the exact thing you're trying to remove. If your board gets sticky between limes, wipe it dry rather than washing the slices.[/PROTIP]
Method 1: Food Dehydrator — The Professional Method
[PHOTO] Lime wheels on dehydrator trays — evenly spaced for airflow, no overlap. This is how we set every commercial batch.[/PHOTO]
If you want consistent bar-quality results, a food dehydrator is the correct tool. Controlled airflow plus precise temperature is the entire difference between a garnish that looks professional and one that looks homemade.
The target temperature is 135°F (57°C), and the number matters in both directions. Below about 130°F you risk incomplete moisture removal, which is how batches mold in storage weeks later. Above about 145°F you start caramelizing the natural sugars in the peel — the color darkens fast and the aromatic oils dull. 135°F is the window that removes water efficiently while keeping the peel's color and scent intact.
Expect limes to take longer than oranges. A lime wheel is denser and has a higher peel-to-flesh ratio than an orange slice of the same thickness, so plan on 8–12 hours where our orange slices finish in 6–9.
[RECIPE] Method 1: Food Dehydrator Temperature: 135°F (57°C) Time: 8–12 hours (varies with slice thickness, lime size, ambient humidity, and dehydrator model) Batch size: Limited only by your tray count
- Preheat the dehydrator to 135°F and let it reach full temperature before loading trays.
- Arrange the blotted lime wheels in a single layer on each mesh tray. Leave at least ¼" between slices — the airflow around each wheel is what makes a dehydrator outperform an oven.
- Load the trays and start the timer.
- At the 4-hour mark, rotate trays top-to-bottom and bottom-to-top to even out airflow variation inside the unit.
- At the 6-hour mark, peel each wheel off the mesh and flip it. Lime sticks more than any other citrus we run — flipping at least once prevents the flesh from bonding to the tray and tearing when you unload.
- Start checking for doneness at hour 8. Do not test a warm slice. Pull one, let it cool 5 minutes on the counter, then run the snap test.
- Most ⅛" Persian lime wheels finish between 8 and 10 hours. ¼" slices can need 14 or more. In a humid kitchen, add 2–3 hours.
- Pull trays as they pass the snap test. Slices at the outer edge of a tray usually finish before the center — that's normal, not a defect.
[/RECIPE]
[PROTIP]If your dehydrator has a temperature dial rather than a digital readout, verify it with an oven thermometer laid on a tray. Consumer dehydrators routinely run 10–15°F off their dial, and 15°F is the entire margin between a green-amber wheel and a brown one.[/PROTIP]
[product]lime[/product]
Method 2: Oven — How to Dehydrate Limes Without a Dehydrator
No dehydrator? Your oven works, and it's dramatically faster — 3 to 4 hours instead of 8 to 12. The tradeoff is color: an oven runs hotter than the ideal drying window, so oven-dried lime wheels come out noticeably darker and more amber at the edges than dehydrator batches. For home use that's perfectly fine. For a bar program running the garnish on every ticket, a dehydrator is worth the equipment cost.
The consensus temperature across every credible source is 170°F (77°C), and there's a practical reason for it: 170°F is the lowest setting most American home ovens offer. If yours bottoms out at 200°F, use 200°F with the door propped — see the steps below.
[RECIPE] Method 2: Oven Drying Temperature: 170°F (77°C), or your oven's lowest setting. Use convection if you have it — it cuts roughly 25% off the time. Time: 3–4 hours conventional, 2.5–3 hours convection Batch size: 1–2 sheet pans per session
- Preheat the oven to 170°F (77°C). Place an oven thermometer on the rack — home ovens commonly run 25–40°F off the dial, and at these temperatures that error is the whole ballgame.
- Line sheet pans with parchment, then set a wire cooling rack on top. The rack lifts the wheels off the pan so air circulates underneath. Slices laid flat on a pan steam on the bottom instead of drying.
- Arrange the blotted lime wheels in a single layer on the rack. No overlapping.
- Prop the oven door open 1–2 inches with the handle of a wooden spoon or a folded kitchen towel. Venting steam is the single biggest factor in oven drying citrus — a sealed oven traps the moisture you're trying to remove. Skip this only if you're using convection.
- Flip the wheels every 30–45 minutes. Lime slices curl at the edges in an oven more than oranges do, and flipping is what keeps them flat.
- Start checking at the 3-hour mark, cooling a slice for 5 minutes before testing.
- Total time is typically 3–4 hours. Pull individual wheels as they pass rather than waiting for the whole pan.
[/RECIPE]
[PROTIP]Anything above 220°F actual temperature will caramelize the peel faster than the water can leave, and you'll get a brown, slightly toasted wheel with a bitter edge. If your oven can't hold below 200°F, dry in shorter passes: 45 minutes on, 20 minutes off with the door open, repeat. The rest periods let residual moisture migrate to the surface without cooking the peel.[/PROTIP]
Method 3: Air Fryer — Read This Before You Start
Air fryer instructions for dried limes are all over the map online — you'll find 120°F for 2 hours on one site and 200°F for 4 hours on another. Both are right, for different machines, and nobody explains which one you own. Here's the distinction that resolves it.
If your air fryer has a "Dehydrate" function
Most modern oven-style air fryers (Ninja Foodi, Instant Vortex Plus, Cosori dual-function models) will hold 120–130°F (49–54°C). This is the real dehydrate range and it produces the best color of any air fryer method. Expect 2–4 hours for ⅛" lime wheels, flipping once at the halfway point.
If your air fryer is a basket model with a 150°F floor
Most standard basket air fryers won't go below 150–180°F. That's above the ideal drying window, so you're effectively running a very small, very fast oven. Use the lowest setting your unit allows and work in short passes: 20 minutes, flip, 20 minutes, then check every 10. Total time is usually 45–75 minutes. Expect darker wheels than the other two methods — this is a "garnish for tonight" technique, not a pantry-stocking one.
[RECIPE] Method 3: Air Fryer Temperature: 120–130°F if your unit has a dehydrate function; otherwise the lowest available setting (typically 150–180°F) Time: 2–4 hours on dehydrate; 45–75 minutes on a basket model Batch size: 6–10 wheels per round, single layer only
- Preheat to your target temperature.
- Lay the lime wheels in a single layer in the basket or on the rack. Overlapping creates soft spots — air fryer circulation is powerful but it needs a clear lane around each wheel.
- Dehydrate function: run 90 minutes, flip every wheel, then run in 30-minute intervals until the snap test passes.
- Basket model: run 20 minutes, flip, run another 20, then check every 10 minutes. These go from done to scorched quickly.
- Cool a test wheel for 5 minutes before judging it. Air fryer results vary more between machines than either other method — trust the snap test, not the timer.
[/RECIPE]
[PROTIP]A basket air fryer's fan is strong enough to lift a thin lime wheel off the rack and blow it into the heating element. Weigh the slices down with a small metal rack or an air-fryer-safe trivet for the first pass, before they stiffen.[/PROTIP]
Method Comparison at a Glance
| Method | Temp | Time | Batch Size | Color Result | Best For |
|---|---|---|---|---|---|
| Food Dehydrator | 135°F (57°C) | 8–12 hrs | Large (multi-tray) | Best — most green retained, most consistent | Bar programs, bulk batches, top quality |
| Oven | 170°F (77°C), door propped | 3–4 hrs | Medium (1–2 sheet pans) | Good — noticeably more amber at edges | Home use, no dehydrator, same-day results |
| Air Fryer (dehydrate function) | 120–130°F (49–54°C) | 2–4 hrs | Small (6–10 wheels) | Very good | Small, high-quality batches |
| Air Fryer (basket, 150°F floor) | Lowest setting available | 45–75 min | Small (6–10 wheels) | Variable — darkest of the four | Garnishes for tonight's drinks |
How to Know When They're Done
This is where most guides leave you stranded — "dry until done" tells you nothing. Here are the three tests we run on every commercial batch, in the order we run them.
The Snap Test
Pull a wheel off the heat and let it cool at room temperature for a minimum of 5 minutes. Then bend it firmly. A correctly dried lime wheel snaps cleanly — it should feel like stiff cardboard, not flexible rubber. If it bends without breaking, it needs more time. Never test a warm slice: residual heat makes a finished wheel feel soft and will send you chasing a batch that was already done two hours ago.
The Press Test
Tear a cooled wheel in half and press the cut edges hard between your fingers. There should be zero moisture transfer to your skin. Any tackiness, dampness, or sticky residue at the center — where the flesh is thickest — means the batch isn't finished. The center of a lime wheel is always the last part to dry.
The Weight Check (Commercial Method)
At production scale we weigh batches before and after. Lime wheels lose roughly 80–85% of their weight during dehydration — more than oranges, because there's less sugar solid left behind. One pound of fresh lime slices should come out around 2.5–3.2 oz dry. If your finished weight is meaningfully higher, there's still water in there, and it will find you later as mold.
[QUOTE]We never pack a batch that hasn't passed the snap test. One tacky wheel in a sealed pouch can seed mold across the entire container. In a commercial garnish operation the snap test isn't a suggestion — it's the final QC gate.[/QUOTE]
Why Do Dehydrated Limes Turn Brown?
Dehydrated limes turn brown because of heat, not oxidation. As water leaves the peel, the natural sugars concentrate and begin to caramelize — a non-enzymatic browning reaction driven by temperature and time. This is why an acid dip does nothing: citric acid, lemon juice, and ascorbic acid prevent enzymatic browning in fruits like apples, pears, and bananas. A lime is already saturated with citric and ascorbic acid. Adding more accomplishes nothing chemically. The only lever that actually controls browning is temperature.
This matters because the internet is full of workarounds that don't work. Home testers have systematically tried blanching, simple syrup coatings, tonic water dips, candying, and refrigerator drying to keep lime wheels green. None of them preserve the color. Food-safety extension programs, including Colorado State University's food preservation guidance on drying citrus, recommend no pretreatment at all for citrus.
What actually reduces browning
- Run the lowest temperature you can hold. 135°F in a dehydrator is the best practical balance of color and food safety. Every 10°F above that visibly darkens the batch.
- Blot the slices before loading. Surface juice has to boil off before drying starts, and that extra time on heat is browning time.
- Slice thinner. A 3mm wheel spends far less total time on heat than a 6mm one.
- Use fresh, deep-green limes. Fruit that's already turning yellow dries duller. Every time.
- Store in the dark. Light continues to fade dried citrus in the jar. A clear jar on a sunny shelf will brown over weeks even after a perfect dry.
What to expect, honestly
A correctly dried Persian lime wheel is olive-green at the rind, translucent gold-green in the flesh. It is not the neon green of a fresh lime and never will be. Some darkening is chemistry, not a mistake, and it does not indicate spoilage. What does indicate a problem is uneven scorching — dark rings or burnt edges — which means your temperature ran too high. Drop it 10–15°F and add time.
[PROTIP]If color is your priority, dehydrator beats oven every time and it isn't close. The 35°F difference between a 135°F dehydrator and a 170°F oven is the difference between olive-green and amber-brown. That single variable is why our commercial wheels look the way they do.[/PROTIP]
Why Dried Limes Taste Bitter (and How to Fix It)
Bitterness in dried lime is almost always the pith — the white layer between the peel and the flesh. Pith is bitter fresh, and dehydration concentrates it. If your wheels taste harsh or leave a lingering acrid finish, this is why.
Three fixes, in order of effectiveness:
- Choose thin-skinned limes. Firm, heavy, smooth-skinned Persian limes have the least pith relative to flesh. Thick, spongy, lightweight fruit has the most. This is the highest-leverage decision and it happens at the grocery store.
- Slice thinner. At 3mm you're taking a proportionally thinner cross-section of pith than at 6mm.
- Blanch, if it's really bothering you. Drop the wheels in boiling water for 2 minutes, then shock in an ice bath and blot thoroughly dry before drying. This leaches some bitter compounds out of the pith. Be clear on what it does and doesn't do: blanching reduces bitterness, it does not preserve color — and it adds surface water you then have to remove, so expect a longer dry.
One thing not to attempt: grinding whole dried lime wheels into powder. The pulp rarely dries hard enough to grind cleanly, it gums up blades, and the pith fragments turn the result unpleasantly bitter. If you want lime powder, dry the zest alone.
Yield: How Many Wheels You Actually Get Per Lime
Published numbers for this range from 5 to 12 wheels per lime, which tells you most of them are guesses. Here are ours, from production, with the end cuts and defects already subtracted.
| Input | Slice Thickness | Garnish-Quality Wheels | Approx. Dried Weight |
|---|---|---|---|
| 1 Persian lime (medium, ~2") | ⅛" (3mm) | 6–8 | ~0.35 oz |
| 1 Persian lime (medium, ~2") | ¼" (6mm) | 4–5 | ~0.35 oz |
| 1 lb fresh limes (~5–6 limes) | ⅛" (3mm) | 32–45 | 2.5–3.2 oz |
| 1 Key lime | ⅛" (3mm) | 3–4 (small diameter) | ~0.1 oz |
Why "garnish-quality" is doing work in that column: a whole lime physically produces more slices than that. But the two end cuts are discards, the first and last wheels are undersized and lopsided, and in any real batch a few tear on the mandoline or bond to the tray. Plan on 6–8 usable wheels per lime and you'll be right.
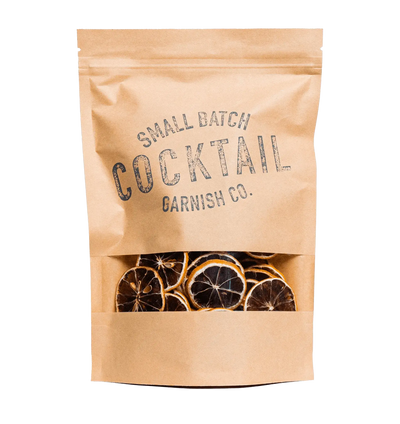
Practical math for a bar program: a 200-Margarita weekend needs roughly 30 limes' worth of dried wheels, which is four to five dehydrator trays and a full overnight cycle — before anyone has washed, sliced, blotted, flipped, cooled, conditioned, and packed them. That labor calculation is the reason most of our wholesale accounts stopped drying in-house. For reference, a 3.0 oz bag of our dehydrated lime slices holds 55 wheels, and a 6-pack wholesale case holds 330+.
Conditioning & Storage
A correctly dried batch stored incorrectly is a wasted batch. This section is the one most guides skip entirely, and it's the reason home batches mold three weeks later.
Step 1: Cool completely — 20 minutes minimum
Let every wheel cool at room temperature for at least 20 minutes before it goes into any sealed container. Residual heat becomes steam inside a closed jar, steam becomes condensation, and condensation rehydrates your slices from the inside. This is the single most common mistake in home batches.
Step 2: Condition for 7–10 days
Conditioning is what separates a batch that keeps from one that molds, and almost nobody publishes it. Even in a well-dried batch, individual wheels finish with slightly different residual moisture. Conditioning equalizes it and — critically — shows you if you've under-dried.
- Pack the cooled wheels loosely into a clean glass jar, filling it about two-thirds full. Seal it.
- Store at room temperature, out of direct light, for 7–10 days.
- Shake the jar once a day. This redistributes moisture between slices and keeps them from clumping.
- Check the glass daily for condensation. Any moisture on the inside of the jar means the batch is not dry. Return the whole batch to the dehydrator for another 1–2 hours, cool, and restart conditioning.
- Ten days with no condensation means the batch is stable and ready for long-term storage.
Step 3: Store it properly
- Airtight glass mason jars — ideal. Glass doesn't off-gas or interact with citrus oils.
- Vacuum-sealed bags — excellent for volume storage.
- Resealable kraft pouches with oxygen absorbers — how we ship to wholesale bar accounts.
- One food-safe silica gel desiccant pack per jar. In the Southeast, the Gulf, coastal California, or anywhere humid, this is not optional — ambient humidity will re-soften a sealed jar over time.
- Cool, dark, dry. A pantry shelf or back-bar cabinet. Not a windowsill, not above the stove.
- Don't refrigerate. Every door opening runs a condensation cycle that degrades dried citrus faster than a sealed jar at room temperature.
Shelf life
- Cocktail and culinary use: best within 9 months for full aroma and flavor. Lime's volatile oils fade faster than orange or lemon — it's the most aromatic citrus we dry and the first to lose its punch.
- After opening a sealed package: use within about 3 months, or reseal with a fresh desiccant.
- Decorative use: up to 18 months in a properly sealed, dark, desiccant-protected container.
- Discard immediately if: any wheel is tacky, has lost rigidity, smells musty or fermented, or shows fuzz or discoloration in patches rather than evenly.
[PROTIP]Label the jar with the drying date. Dried lime looks essentially the same at month 2 and month 14 — the aroma is what degrades, and you won't notice the drift until the garnish stops smelling like anything.[/PROTIP]
Troubleshooting: Every Way a Batch Goes Wrong
| What Happened | Why | The Fix |
|---|---|---|
| Wheels came out brown or amber instead of green | Temperature too high — peel sugars caramelized | Drop to 135°F (dehydrator) or your oven's lowest setting; accept a longer cycle. Some darkening is unavoidable. See why dehydrated limes turn brown. |
| Still soft and bendy after 12 hours | Slices too thick, trays overloaded, or high ambient humidity | Keep going — 14–16 hours is normal in a humid kitchen at ¼". Verify actual temperature with a thermometer and make sure nothing overlaps. |
| Molded in the jar after a few weeks | Under-dried, and no conditioning step to catch it | Discard the batch. Next time run the press test on center flesh, then condition for 7–10 days. |
| Wheels welded to the trays and tore | Surface juice never blotted off | Blot both sides before loading; flip at the 6-hour mark. Mesh tray liners help. |
| Edges curled up, centers still wet | Uneven heat — classic oven behavior | Flip every 30–45 minutes; use convection; elevate on a wire rack for airflow underneath. |
| Tastes harshly bitter | Thick pith concentrated during drying | Thin-skinned limes, 3mm slices, or a 2-minute blanch. See why dried limes taste bitter. |
| Some wheels done, others not | Inconsistent thickness — the mandoline argument in one line | Pull finished wheels as they pass and leave the rest. Uniform slicing prevents it next time. |
| Went soft again weeks after drying | Ambient humidity got through the seal | Add a silica desiccant pack, move out of light, re-dry 1–2 hours and reseal. |
| Scorched with dark rings | Oven running much hotter than the dial says | Put a thermometer on the rack. Home ovens run 25–40°F off routinely. |
| Wheel snapped on the glass rim | Sliced too thin, or over-dried to brittleness | 3mm is the floor for a rim garnish. Below that you get a chip, not a wheel. |
Cocktail Pairing Guide — Where a Dried Lime Wheel Earns Its Place
Every other article on this topic says "great for cocktails" and stops. That's a caption, not a guide. Here's where dried lime specifically outperforms a fresh wedge, and where it doesn't.
| Cocktail | How to Use It | Why It Works |
|---|---|---|
| Margarita | Perched on a salted rim | The flagship application. A dried wheel holds the rim all night without sliding into the salt line and dissolving it — the exact failure mode of a fresh wedge. Pair with our blood orange & pink salt rimmer for color contrast. |
| Paloma | Rim perch, or floated on top | Lime's sharpness cuts grapefruit soda's sweetness. Try a lime wheel and a dried grapefruit slice together for a two-tone presentation. |
| Moscow Mule | Dropped in the copper mug against the mint | Green-gold against copper is the best color pairing dried lime has. It also won't go limp in a mug that's been on ice for twenty minutes. |
| Mojito | Floated on top with the mint crown | Sits on the crushed ice rather than sinking. Slowly rehydrates and releases concentrated lime aromatics into the mint. |
| Ranch Water | In the bottle neck or on the rim | A three-ingredient drink lives or dies on presentation. A dried wheel is the entire visual. |
| Gin & Tonic | Dropped in, with botanicals | Rehydrates gently in the tonic and releases peel oils that complement juniper. Excellent alongside butterfly pea flower for a color-changing pour. |
| Daiquiri | Rim perch, coupe or Nick & Nora | A stemmed glass has no room for a wet wedge. A rigid dried wheel sits cleanly on the rim without dripping down the stem. |
| Michelada | Rim perch on a chili-salt rim | Stands up to a heavily dressed rim. Fresh lime turns the spice rim to paste within minutes. |
| Mocktails & N/A spritzes | Anywhere you'd use fresh | Zero-proof drinks lean hard on presentation and aroma to feel like a cocktail. This is where dried garnish carries the most weight. |
Where it doesn't work: anything that needs juice. A dried wheel is a garnish and an aromatic, not a squeeze. If the recipe calls for a lime to be juiced tableside, use fresh — and use a dried wheel for the rim.
[RECIPE] The Ranch Water with a Dried Lime Wheel Glassware: Highball or the original tall bottle Ingredients: - 2 oz blanco tequila - 0.75 oz fresh lime juice - Topo Chico or sparkling mineral water to top - 1 dehydrated lime wheel (CGC or homemade)
- Fill a highball glass with ice.
- Add the blanco tequila and fresh lime juice.
- Top with sparkling mineral water and stir once, gently, to combine without knocking out the carbonation.
- Perch a dehydrated lime wheel on the rim, or float it on top. A properly dried wheel holds the rim without a clip or pick — a fresh wheel will not.
- Optional: a light chili-lime salt rim on half the glass. The dried wheel won't soften it the way a fresh wedge does.
[/RECIPE]
Want more lime-forward builds? See our spring patio-season cocktail lineup.
Frequently Asked Questions
How long does it take to dehydrate limes?
It depends on the method: a food dehydrator at 135°F takes 8–12 hours; a conventional oven at 170°F takes 3–4 hours; an air fryer takes 2–4 hours on a dehydrate setting or 45–75 minutes on a basket model. Limes take longer than oranges at the same thickness because they're denser and have a higher peel-to-flesh ratio. Always confirm with the snap test after cooling rather than trusting the clock.
What temperature do you dehydrate limes at?
135°F (57°C) in a food dehydrator. That's the window that removes moisture efficiently without caramelizing the peel sugars. In a conventional oven, use 170°F (77°C) — the lowest setting on most home ovens — with the door propped open 1–2 inches to vent steam. In an air fryer with a dehydrate function, 120–130°F (49–54°C).
Why did my dehydrated limes turn brown?
Heat, not oxidation. As water leaves the peel, its natural sugars concentrate and caramelize — a non-enzymatic browning reaction driven by temperature and time. This is why citric acid, lemon juice, and ascorbic acid dips don't help: those prevent enzymatic browning in fruits like apples, and a lime is already full of acid. The only real lever is running a lower temperature for longer. Some darkening is unavoidable, and it does not mean the batch has spoiled.
How do you know when dehydrated lime slices are done?
The snap test. Remove a wheel, cool it at room temperature for 5 minutes, then bend it firmly — a finished wheel snaps cleanly rather than bending. Back that up with the press test: tear a cooled wheel and press the center flesh between your fingers, where there should be zero moisture transfer. Never test a warm slice; residual heat makes finished wheels feel deceptively soft.
How long do dehydrated limes last?
About 9 months for cocktail and culinary use, stored airtight with a silica gel desiccant pack in a cool, dark place. After opening a sealed package, use within roughly 3 months or reseal with fresh desiccant. For purely decorative use, up to 18 months. Lime's aromatic oils fade faster than orange or lemon, so a wheel can look fine long after it has stopped smelling like much.
Can you dehydrate limes without a dehydrator?
Yes. Use a conventional oven at 170°F (or its lowest setting) for 3–4 hours, with the slices on a wire rack set over a parchment-lined sheet pan and the oven door propped open 1–2 inches to let steam escape. Flip every 30–45 minutes. Convection cuts the time by roughly 25%. Expect somewhat more amber color than a dehydrator produces.
Can you dehydrate limes in an air fryer?
Yes, but which instructions apply depends on your machine. Oven-style air fryers with a dedicated dehydrate function hold 120–130°F and take 2–4 hours, producing good color. Standard basket air fryers won't go below about 150°F, so run the lowest setting in short passes — 20 minutes, flip, 20 minutes, then check every 10 — for a total of 45–75 minutes, and expect darker results.
How thick should you slice limes for dehydrating?
⅛" (3mm) for cocktail garnish. That's the commercial standard: thin enough to dry evenly and turn translucent, thick enough to hold a salted rim without tearing. Use ¼" (6mm) only for cooking, tea, or infusions — it takes considerably longer to dry and darkens more in the process. A mandoline is the only reliable way to hit 3mm consistently on a round fruit.
How many wheels do you get from one lime?
Six to eight garnish-quality wheels from a medium Persian lime at ⅛", after discarding both end cuts and any slices that tear. One pound of fresh limes — roughly five to six fruit — yields about 32–45 usable wheels and 2.5–3.2 oz of dried weight. Published claims of 12 wheels per lime don't account for end cuts and defects.
Are dehydrated limes edible?
Yes, entirely — peel included. Dehydration softens the rind's texture considerably and concentrates its oils, so biting into a dried wheel delivers a burst of citrus rather than the harshness of raw peel. Bitterness, when it shows up, comes from the white pith, which is why thin-skinned limes sliced at 3mm taste best.
Do dehydrated lime slices need to be refrigerated?
No, and refrigeration works against you. Every time the door opens, a cold container runs a condensation cycle that gradually re-softens dried citrus. Store at room temperature in an airtight container with a silica pack, away from light and heat.
Why do my dried limes taste bitter?
The pith. That white layer between peel and flesh is bitter fresh and gets more so as it dries. Buy firm, heavy, thin-skinned Persian limes, slice at 3mm, and if it still bothers you, blanch the wheels for 2 minutes and shock them in ice water before blotting dry and drying. Blanching reduces bitterness — it does not preserve color, and it adds surface moisture you'll need to remove.
Should I use citric acid or lemon juice to keep my limes green?
No. Acid pretreatments prevent enzymatic browning in fruits like apples, pears, and bananas. Lime browning is non-enzymatic — it's heat-driven caramelization of peel sugars — and a lime is already saturated with citric and ascorbic acid. Extension food-preservation guidance recommends no pretreatment for citrus at all. Lower your temperature instead.
Is it cheaper to dehydrate limes yourself or buy them?
For a home bar, DIY is cheaper and genuinely satisfying — a $4 bag of limes and one overnight cycle gets you a season's garnishes. For a commercial bar program the math flips fast: a 200-Margarita weekend takes roughly 30 limes, four to five dehydrator trays, an overnight run, plus the labor to wash, slice, blot, flip, cool, condition and pack. Most of our wholesale accounts ran the numbers on staff hours and equipment and moved to a supplier.
Skip the Process — Order Bar-Quality Lime Wheels Directly
Making your own dried lime wheels is worth doing at least once, and now you have the whole process — the real temperatures, the real yields, and the parts nobody else publishes. But if you're running a bar program and need consistent supply without dedicating equipment, tray space, and labor hours to it, that's exactly what we make.
Every CGC dehydrated lime slice is hand-cut to 3–4mm on commercial equipment, slow-dried in our White Plains, New York facility, snap-tested before packing, and shipped in resealable kraft pouches with oxygen absorbers. 100% lime — no sulfur, no added sugar, no preservatives, no artificial color. Same process as this guide, at production scale and consistent batch to batch.
Over 1,300 bars and restaurants across the country rely on us for their garnish supply. Whether it's one bag for a weekend or a standing wholesale case order, we ship nationwide.
Shop CGC Dehydrated Lime Slices (55ct) →
Bulk & Wholesale: 6-Pack Case, 330+ Lime Wheels →
[photo] [/photo]
Looking for other citrus garnishes?
Browse the full lineup: Dehydrated Lemon Slices · Dehydrated Orange Slices · Dehydrated Grapefruit Slices · Dehydrated Blood Orange Slices · 3-Pack Citrus Bundle
Drying other citrus next? Read our companion guide: How to Dehydrate Orange Slices (Bar-Quality Results at Home).
Rate this guide
5.0 out of 5 · 6 ratings
Thanks — rating recorded.