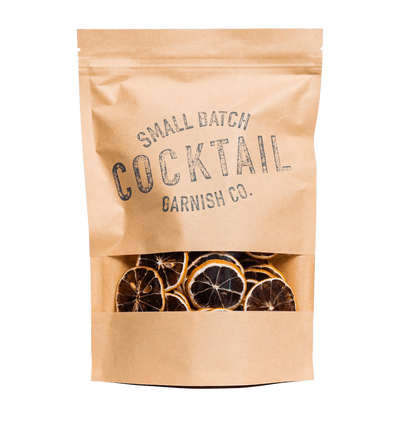
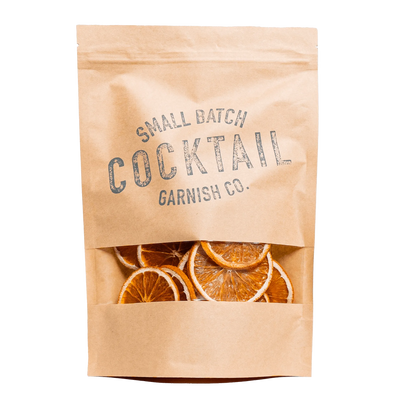
[PHOTO] Bar-quality dehydrated orange slices — made at 135°F using a food dehydrator for consistent color, snap, and aroma.[/PHOTO]
We produce thousands of dehydrated orange slices every week for bars and restaurants across the country. After years of dialing in temperature, slice thickness, humidity thresholds, and storage protocols at commercial scale, we know exactly what separates a garnish-quality dried orange from a batch that goes soft, sticky, or brown before it ever touches a glass.
This guide shares that knowledge — without reservation. Whether you're a home bartender who wants cocktail-bar results, or a bar manager weighing DIY production against a wholesale supplier, here's how to dehydrate orange slices the way professionals actually do it.
We'll cover all three methods — food dehydrator, oven, and air fryer — plus a cocktail pairing guide, storage deep-dive, and the yield math nobody else publishes.
Why Dehydrated Orange Slices Are a Bar Essential
Fresh citrus is a liability behind a bar. It oxidizes, wilts, and loses structural integrity within hours of cutting. A dehydrated orange slice solves all three problems simultaneously.
Properly dried at low heat, a dehydrated orange wheel concentrates its natural oils and aromatics rather than losing them. The result is a garnish that actually smells like orange when a guest lifts their glass — not just something that looks like one. The rigid structure holds a rim perch all night without drooping into the drink.
They work across a wider range of drinks than any other citrus garnish: Old Fashioneds, Negronis, Aperol Spritzes, Whiskey Sours, Sangria, Mulled Wine, Mezcal cocktails. And because a properly dehydrated and sealed batch stores for 12–24 months, you build an inventory buffer that fresh citrus simply can't offer.
[QUOTE]A dehydrated orange wheel does what a fresh slice can't — it holds its shape, concentrates its fragrance, and stays on the rim all night. That's why every high-volume bar account we supply has made the switch.[/QUOTE]
What You'll Need
Ingredients
- Fresh oranges — navel, cara cara, blood orange, Valencia, or mandarin (see variety guide below)
- Optional: cinnamon sticks, whole cloves, or confectioner's sugar for spiced or flavored variants
Equipment
- Mandoline slicer — non-negotiable for uniform thickness. Uneven slices dry unevenly: some burn while others are still wet.
- Sharp serrated knife (backup for mandoline)
- Food dehydrator (preferred), or conventional oven, or air fryer
- Wire cooling rack + rimmed sheet pan (for oven method)
- Parchment paper or silicone baking mat
- Clean kitchen towels for patting slices dry
- Airtight glass mason jars or vacuum-sealed bags for storage
- Silica gel desiccant packs — critical for long-term storage in humid climates
Choosing the Right Orange — Variety Comparison
The variety of orange you choose directly affects the dried color, flavor profile, and yield. This is the decision most home guides skip. Don't skip it — especially if you're making garnishes for specific cocktails.
| Variety | Dried Color | Flavor Profile | Best For | Approx. Yield (per orange) |
|---|---|---|---|---|
| Navel Orange | Classic amber-orange | Bright, clean, mildly sweet | Everyday garnish workhorse — Negroni, Whiskey Sour | 8–10 garnish-quality slices |
| Cara Cara | Pink-blush to salmon | Low-acid, berry-adjacent sweetness | Aperol Spritz, rosé cocktails, gin & tonics | 7–9 garnish-quality slices |
| Blood Orange | Deep burgundy-crimson | Rich, earthy, raspberry-citrus | Mezcal cocktails, Old Fashioneds, premium presentation | 6–8 garnish-quality slices |
| Valencia Orange | Golden-orange | Juicy, tart-sweet balance | Sangria, mulled wine — rehydrates well in warm drinks | 9–11 garnish-quality slices |
| Mandarin / Clementine | Bright orange, smaller wheel | Sweet, floral, low bitterness | Spritz garnishes, mocktails, smaller glassware | 5–7 garnish-quality slices |
Pro note from our production floor: Blood oranges and cara caras are premium garnishes that command attention on a menu. Navel is the high-volume workhorse. Blood oranges may dry 15–20% faster than navels due to their slightly lower water content — keep that in mind if mixing varieties in a single batch.
Yield math for bar programs: One pound of fresh navel oranges yields approximately 18–22 garnish-quality slices at ⅛" thickness, after accounting for end cuts and any slices with structural defects. Plan accordingly for volume service.
Prep: Washing & Slicing Your Oranges
[RECIPE] Prep: Washing & Slicing Your Oranges Ingredients: - Fresh oranges (any variety — see comparison above) - Cool water for washing Equipment: - Mandoline slicer set to ⅛" (3mm) - Clean kitchen towels - Cutting board Steps:
- Scrub oranges under cool running water using a produce brush or clean towel. The rind will be visible — and edible — in the finished garnish, so don't skip this step.
- Trim a thin slice off each end of the orange and discard. End slices lack the visual symmetry of a proper citrus wheel.
- Set your mandoline to ⅛" (3mm). This is the commercial standard for garnish-grade slices — thin enough to dry evenly, thick enough to hold structural integrity on a rim. ¼" is the ceiling; anything over ¼" will take significantly longer to dry and risks uneven results in an oven.
- Slice each orange into uniform wheels across the entire fruit.
- Lay slices in a single layer on clean kitchen towels and pat firmly dry. Removing surface moisture before drying reduces total drying time and improves color retention. [/RECIPE]
Method 1: Food Dehydrator — The Professional Method
[PHOTO] Orange slices arranged on Excalibur dehydrator trays — evenly spaced for maximum airflow. This is how we set every commercial batch.[/PHOTO]
If you want bar-quality results consistently, a food dehydrator is the correct tool. It's how we run every batch at CGC — controlled airflow and precise temperature make the difference between a garnish that looks professional and one that looks homemade.
The target temperature is 135°F (57°C). Here's why that number matters: below 130°F, you risk incomplete moisture removal and potential mold. Above 145°F, you begin caramelizing the natural sugars in the rind, which darkens the color and dulls the aromatic oils. 135°F is the window that preserves the orange's natural color vibrancy, locks in the scent, and achieves a clean snap without brittleness.
[RECIPE] Method 1: Food Dehydrator Temperature: 135°F (57°C) Time: 6–9 hours (varies by orange variety, slice thickness, and dehydrator model) Batch size: Limited only by your dehydrator's tray count
- Preheat your dehydrator to 135°F. Allow it to reach full temperature before loading trays.
- Arrange orange slices in a single layer on each mesh tray. Leave at least ¼" of space between slices — airflow between them is what makes a dehydrator superior to an oven.
- Load trays and start the timer.
- At the 3-hour mark, rotate trays (top to bottom, bottom to top) to account for any airflow variation within the unit.
- Begin checking at the 6-hour mark. Do not test slices while warm — they will feel softer than they are. Remove a slice, let it cool for 5 minutes on the counter, then apply the snap test (see Section 10).
- Most ⅛" navel orange slices are done in 6–8 hours. Blood oranges often finish closer to 6 hours. ¼" slices may need the full 9 hours.
- Remove finished trays as slices pass the snap test. Not all slices in a batch finish simultaneously — that's normal.
Do not test dehydrated orange slices while they are still warm. A slice that feels soft and pliable at 135°F can still be correctly dried — the residual heat gives a false reading. Always cool to room temperature before doing the snap test.[/RECIPE]
[product][/product]
Method 2: Oven — The Accessible Method
No dehydrator? Your oven works — with some adjustments. Oven-dried orange slices will have slightly more color variation than dehydrator batches (darker at the edges, lighter at center), which is fine for home use. For commercial garnish programs, a dehydrator is worth the investment.
[RECIPE] Method 2: Oven Drying Temperature: 170–200°F (use convection setting if available — it improves airflow significantly) Time: 3–5 hours Batch size: 1–2 sheet pans per session.
- Preheat oven to 170–200°F. If your oven doesn't go below 200°F, use the lowest available setting with the door propped slightly open (see tip below).
- Line sheet pans with parchment paper, then set a wire cooling rack on top of the parchment. The rack elevates slices off the pan surface — this allows air to circulate underneath and significantly reduces the risk of the bottom of the slice steaming rather than drying.
- Arrange orange slices in a single layer on the rack. No overlapping.
- Place pans in the oven. If using convection, no modification needed. If using conventional heat, prop the oven door open approximately 1–2 inches using a folded kitchen towel or the handle of a wooden spoon. This vents steam, which is the biggest barrier to oven drying citrus.
- Flip slices every 45–60 minutes for even drying.
- Begin checking at the 3-hour mark using the snap test after cooling a slice.
- Total time is typically 3–5 hours depending on your oven, slice thickness, and orange variety. [/RECIPE] [PROTIP]If your oven runs hot (common in older home ovens), place an oven thermometer on the rack before starting. Actual temperature can vary 25–40°F from the dial setting. Anything above 220°F will begin caramelizing the rind and darkening your slices faster than expected.[/PROTIP]
Method 3: Air Fryer — The Quick Method
An air fryer is the fastest option, but its small basket means you're working in small batches. It's ideal for making a handful of garnishes for tonight's cocktails — not for building a pantry supply.
[RECIPE] Method 3: Air Fryer Temperature: 175–180°F Time: 1 – 1.5 hours Batch size: 6–10 slices per round (single layer only)
- Preheat air fryer to 175–180°F.
- Place orange slices in a single layer in the basket. Overlap will result in soft spots — the air fryer's circulation is powerful but requires clear lanes around each slice.
- Run for 30 minutes, then flip each slice.
- Run for another 30 minutes. Check using the snap test after cooling.
- If not done, continue in 15-minute intervals, flipping each time, until snap test passes. 6. Note: Air fryer results vary more than the other two methods — check frequently after the first hour. [/RECIPE]
Method Comparison at a Glance
| Method | Temp | Time | Batch Size | Color Result | Best For |
|---|---|---|---|---|---|
| Food Dehydrator | 135°F | 6–9 hrs | Large (multi-tray) | Excellent — consistent, vibrant | Bar programs, bulk batches, best quality |
| Oven | 170–200°F | 3–5 hrs | Medium (1–2 sheet pans) | Good — slight edge variation | Home use, no dehydrator |
| Air Fryer | 175–180°F | 1–1.5 hrs | Small (6–10 slices) | Variable — check frequently | Small batches, quick turnaround |
How to Know When They're Done
This is where most home guides fail you — they say "dry until done" without telling you what done actually looks, feels, and behaves like. Here are the tests we use on every commercial batch.
The Snap Test
Remove a slice from the heat and let it cool at room temperature for a minimum of 5 minutes. Then bend it firmly. A correctly dehydrated orange slice will snap cleanly — it should feel more like stiff cardboard than flexible rubber. If it bends without breaking, it needs more time.
The Press Test
Tear a cooled slice in half and press each side firmly between your fingers. There should be zero moisture transfer to your skin. Any tackiness, moisture, or sticky residue means the batch isn't done.
The Weight Check (Commercial Method)
At production scale, we weigh batches before and after drying. Orange slices lose approximately 75–80% of their weight during dehydration. A batch of 1 lb fresh slices should come out around 3.2–4 oz dry. If your dry weight is higher, there's still moisture to remove.
[QUOTE]We never pack a garnish batch that hasn't passed the snap test. One tacky slice in a sealed case can generate mold spread that ruins the entire container. In a commercial garnish operation, the snap test isn't a suggestion — it's the final QC gate.[/QUOTE]
Storage Guide
A correctly dried orange slice stored incorrectly is a batch wasted. Here's the full protocol.
Cool Completely Before Sealing
Allow all slices to cool at room temperature for a minimum of 20 minutes before placing them in any sealed container. Residual heat generates steam inside a sealed jar — and that steam becomes condensation that rehydrates your slices from the inside out.
Container Options
- Airtight glass mason jars — ideal. Wide-mouth Ball or Weck jars work well. Glass doesn't off-gas or interact with the citrus oils.
- Vacuum-sealed bags — excellent for volume storage or shipping.
- Resealable kraft stand-up pouches with oxygen absorbers — this is how CGC ships to our wholesale bar accounts.
Desiccant
Add one food-safe silica gel pack per mason jar. In humid climates (Southeast, Pacific Northwest, coastal locations), this is not optional — ambient humidity will re-soften slices in a jar even through a good seal over time.
Location
Store in a cool, dark location — a pantry shelf, cabinet, or back bar storage. Avoid the refrigerator unless your environment is extremely humid. Opening and closing a cold refrigerator door repeatedly introduces condensation cycles that degrade quality faster than room-temperature storage in a sealed container.
Shelf Life
- Culinary / cocktail use: Best within 12 months for peak aroma and flavor expression.
- Decorative use: Up to 18–24 months in a properly sealed container with desiccant.
- Early warning sign: Any tackiness, loss of rigidity, or off-odor means discard the batch.
[PROTIP]Always let slices cool fully — minimum 20 minutes — before sealing. Even a small amount of residual heat will create condensation inside your container and undo hours of work. This is the single most common mistake home batches make.[/PROTIP]
Cocktail Pairing Guide — Which Orange for Which Drink
Every other article on this topic says "great for cocktails" and moves on. That's not a guide — that's a caption. Here's the actual breakdown, by drink, of which orange variety to reach for and why the combination works.
| Cocktail | Best Orange Variety | Why It Works |
|---|---|---|
| Old Fashioned | Navel or Blood Orange | The deep amber of navel mirrors whiskey's color. Blood orange adds visual drama and earthy richness that complements bourbon or rye. |
| Negroni | Navel Orange | The classic pairing. Bright orange against the ruby red of Campari is a textbook color contrast — and the citrus aromatics cut through the bitterness cleanly. |
| Aperol Spritz | Cara Cara | The blush-pink flesh of cara cara echoes the Spritz's coral hue. Visually cohesive and the low-acid sweetness plays well with Aperol's orange-forward profile. |
| Whiskey Sour | Navel Orange | Clean, bright citrus aromatics complement the sour profile without competing. The vivid orange color pops against a foam top. |
| Mezcal / Tequila cocktails | Blood Orange | Smoky, earthy mezcal finds a natural counterpart in blood orange's deep, raspberry-adjacent richness. The dark crimson color also photographs beautifully. |
| Sangria / Mulled Wine | Valencia or Navel (spiced variant) | Valencia rehydrates exceptionally well in warm or wine-based drinks, releasing concentrated flavor as it softens. Try a cinnamon-dusted dried navel for holiday applications. |
| Gin & Tonic | Cara Cara or Mandarin | Floral, low-bitterness cara cara pairs cleanly with botanical gins. Mandarin works especially well with lighter glassware where a smaller wheel is more proportional. |
Want to put this pairing to use right now? Here's one of our go-to recipes using a dehydrated orange garnish:
[RECIPE] The Classic Negroni with Dehydrated Orange Garnish Glassware: Rocks glass, large format ice cube Ingredients: - 1 oz gin - 1 oz Campari - 1 oz sweet vermouth - 1 dehydrated navel orange slice (CGC or homemade)
- Fill rocks glass with one large ice cube or several standard cubes.
- Combine gin, Campari, and sweet vermouth in a mixing glass over ice.
- Stir for 30–40 rotations until properly chilled and diluted.
- Strain into the rocks glass over ice.
- Perch one dehydrated orange slice on the rim. The rigid structure of a properly dried slice will hold this position without clips or skewers — a fresh slice cannot.
- Optional: Express a strip of fresh orange peel over the glass before serving for additional aromatic impact. Note: The dehydrated garnish continues releasing concentrated orange aromatics as it warms slightly from the glass — a sensory experience a fresh slice doesn't provide. [/RECIPE]
Frequently Asked Questions
How long does it take to dehydrate orange slices?
It depends on your method: a food dehydrator at 135°F takes 6–9 hours; a conventional oven at 170–200°F takes 3–5 hours; an air fryer at 175–180°F takes 1–1.5 hours. Slice thickness and orange variety also affect timing — always use the snap test after cooling, not the clock alone.
What temperature do you dehydrate orange slices?
135°F (57°C) in a food dehydrator. 170–200°F in a conventional oven (use convection if available). 175–180°F in an air fryer. The dehydrator's lower temperature preserves color and aromatics better than an oven's higher heat.
How do you know when dehydrated orange slices are done?
The snap test: remove a slice from the heat, cool at room temperature for 5 minutes, then bend it firmly. A done slice snaps cleanly. If it bends without breaking, return it for more time. Never test warm slices — residual heat gives a misleading soft reading.
How long do dehydrated orange slices last?
12–24 months when stored in an airtight container with a silica gel desiccant pack, in a cool, dark location. For cocktail and culinary use, best flavor and aroma within the first 12 months. For decorative use, up to 24 months.
Can you dehydrate blood oranges and cara cara oranges the same way?
Yes — the same temperature and method applies to all orange varieties. Blood oranges typically finish 15–20% faster than navels due to their slightly lower water content, so check them earlier in the cycle. Cara cara dries on a similar timeline to navel.
Do dehydrated orange slices need to be refrigerated?
No — and refrigeration can actually work against you. Opening and closing a refrigerator introduces condensation cycles that gradually re-soften dried citrus over time. Store at room temperature in a sealed container with a silica pack, away from light and heat sources.
Can you eat the peel on dehydrated orange slices?
Yes. The rind softens considerably during the dehydration process and becomes much more palatable than raw peel. Many cocktail bars specifically use the dried rind as a flavor component — guests bite into the garnish and get a concentrated hit of citrus oil. It's one of the reasons dehydrated garnishes outperform fresh slices on the sensory experience.
Skip the Process — Order Bar-Quality Garnishes Directly
[PHOTO] CGC dehydrated orange slices garnishing an Old Fashioned at a busy bar — the same garnish we ship to 1,300+ accounts nationwide.[/PHOTO]
Making your own dehydrated orange slices is genuinely rewarding — and now you have the full process. But if you're running a bar program and need a consistent, reliable supply without dedicating equipment and labor hours to production, this is exactly what we make.
Every CGC dehydrated orange slice is produced at 135°F for 6–9 hours, cut to a uniform ⅛" thickness on commercial mandoline equipment, snap-tested before packing, and shipped in resealable kraft pouches with oxygen absorbers. The same process described in this guide, at production scale.
Over 1,300 bars and restaurants across the country trust us for their garnish supply. Whether you need a case for a busy weekend or a standing wholesale order, we ship nationwide.
Shop CGC Dehydrated Orange Slices →
[photo] [/photo]
Looking for other citrus garnishes?
Browse our full lineup: Dehydrated Lemon Slices · Dehydrated Lime Slices · Dehydrated Blood Orange Slices